Image may be NSFW.
Clik here to view.
When I make a page for my scrapbook or digital art journal pages, I almost always start with an embellishment or two and build my page around them. In the Altered Life digital kit and coordinating products, I really liked the hexagon borders and the cluster with the heart.
Image may be NSFW.
Clik here to view.
Once those were placed, I started building my page around them. I added a red background paper and immediately noticed a problem. The cluster blended into the background too much.
Image may be NSFW.
Clik here to view.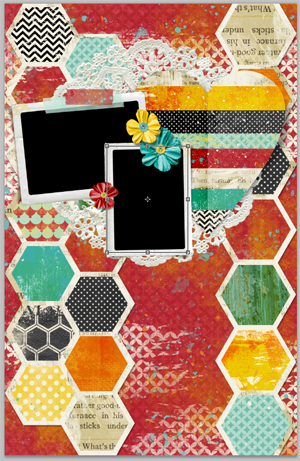
I added a bit of contrast with a couple of paint splats. To make the paint more realistic, I erased along the edges of the hexagons. After all, if I were to paint over layered paper in real life, there would be a ridge with a bit of the paper below showing.
Image may be NSFW.
Clik here to view.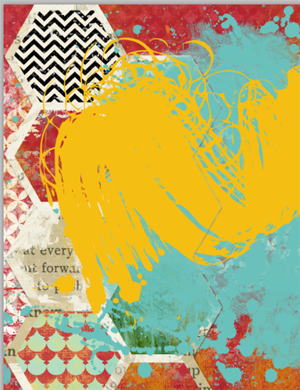
Here’s how you can do it:
1. Holding down Ctrl, click on the thumbnail of the hexagons. You should get “marching ants” around the hexagons.
2. Select the inverse by typing Ctrl+Shift+I. Now your marching ants should be around the outside of the document and the hexagons.
3. Choose your Eraser Tool. My settings were 15 pixels, 0% Hardness, and 50% Opacity. Adjust your eraser to match the object you are erasing around. Generally speaking, you want to be able to see the drop shadow on the paper layer.
4. Select the layer that you want to erase (in this case, the paint). Choose Layer> Rasterize> Smart Object.
Image may be NSFW.
Clik here to view.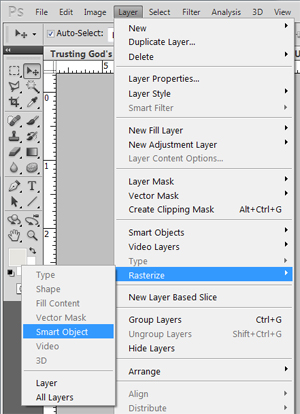 5. Now erase along the edges of the hexagons. Try to keep your brush centered over the marching ants. (Hint: If you click and then hold Shift while you click again, you get a straight line between the two locations.)
For those of you with Photoshop, there is an even quicker method:
Steps 1 and 2 are the same as above.
6. Make your selection slightly smaller by choosing Select> Modify> Contract. I chose 3 pixels for my layout.
7. Then make a Work Path by choosing the Path Palette. Click in the upper right corner of the palette and choose “Make Work Path.” At this point, your marching ants should have turned into a solid grey line.
Image may be NSFW.
Clik here to view.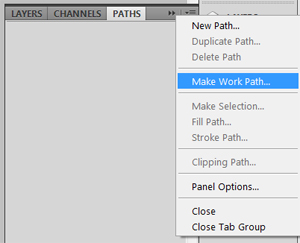
I repeated these steps with the other set of hexagons. I also used them on the title to make it appear to be ink-stamped across the edges of the paper.
Image may be NSFW.
Clik here to view.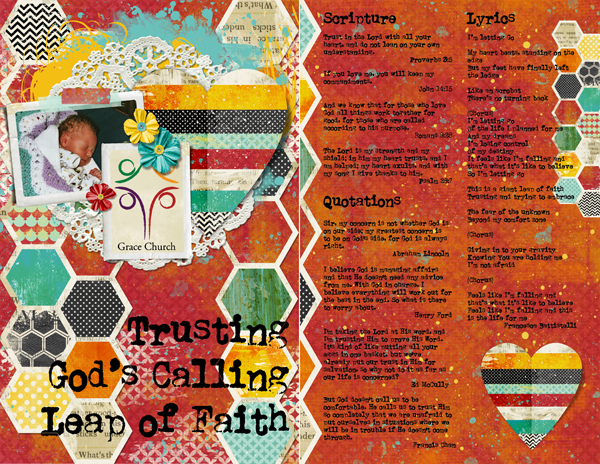
Give this technique a try as you add realism to your digital art journaling, and then show us your results by posting your layouts in the Scrap Girls Gallery!
Digital scrapbooking products used:
Image may be NSFW.
Clik here to view. Image may be NSFW.
Clik here to view. Image may be NSFW.
Clik here to view. Image may be NSFW.
Clik here to view.
Image may be NSFW.
Clik here to view.
Commercial license versions of ScrapSimple Tools – Styles: Basic Shadows 6501are also available.
Image may be NSFW.
Clik here to view.
Article written by Monica Lebsack
The post Adding Realism to Digital Art Journal Pages appeared first on ScrapGirls.